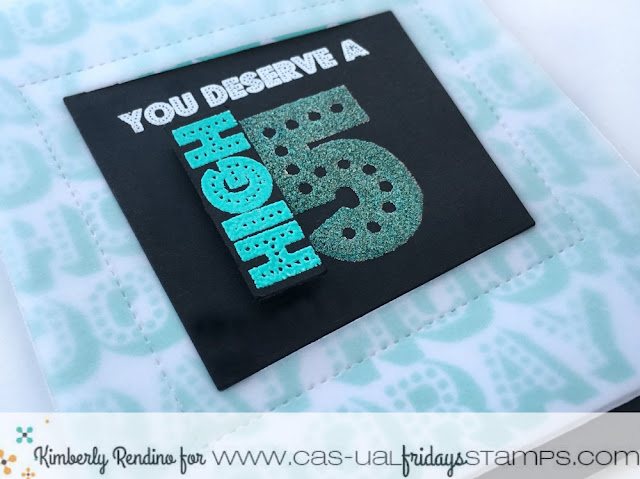
Okay, remember yesterday when I said if you liked the 'Thanks' stamp set you'd love what we have for you today? Well here you have it! Meet the 'Bravo' stamp set! More of that awesome marquee font....these are so much fun to play with, I couldn't stop at one card, so I have two for you today! (Also, be sure to stop by the CAS-ual Fridays blog for a TON of inspiration from the whole DT!)
First up is this fun card using the super cute High 5 image! I began by stamping the image onto a piece of black cardstock with Versamark and coating it with sticky embossing powder. Once it was heated up, I added some Glitter Ritz glitter being sure to burnish it firmly. I was able to color the glitter with a Copic marker to get the fun aqua color you see! I thought it would be fun to 'elevate' the high word (get it? make it high? - sorry, bad joke!) so I stamped it again and heat embossed it with aqua EP. I cut it out and added it on top of the original image with foam tape. I stamped and heat embossed the remainder of the sentiment with white EP. I die cut the image and set it aside to work on the background!
The background is the word Hooray stamped repeatedly. Once I had it finished, I felt it detracted too much from the focal part of my card, so I layered vellum over top of it to soften it up. I love how this turned out!
I've got one more card to share with you, this time using the Bravo Fri-Die!
Oh how I love the way this turned out! And I discovered a neat little trick along the way! I began by die cutting 'Bravo' from masking paper. I set aside the word for another use, and used the negative as a stencil. I blended several colors of distress ink for a gradient look. When I was through, I decided I wanted to die cut the ink blended word after all, so to try to line it up properly (these are closed dies) when I sent it through my Vagabond, I left my masking stencil in place and dropped in the die so that it fit snugly within the stencil. When I removed the die, the alignment wasn't quite perfect, so there were bits of masking paper stuck on my sentiment. I peeled them off and I love the look of the white along the edges!
I added the My Friend sentiment from Mon Ami and some of the Pretty Posies flowers & leaves (also inked with Distress ink and a blending tool) to the front of the card. For a little added interest I used a white gel pen to doodle on the flowers and leaves a bit!
So there is just one more day left of CAS-ual Fridays reveal week - I hope you stop back tomorrow to see what else I've got for you ! See you soon!


Awesome cards - love the use of vellum too
ReplyDeleteLovely cards, like
ReplyDeletethat black one!
Carla from Utah
The use of the vellum on the first card is amazing!! The second card I am in love with your colors. Beautiful design!!
ReplyDelete