Friday, April 21, 2017

Sweet Stamp Shop - Rose Bouquet Friday Feature!

I'm back with another card showing an adorable new stamp set from Sweet Stamp Shop.   It's being released today, and if you've just gotta have it, be sure to join the Sweet Stamp Shop Fan Club on Facebook for a special deal!!!
This is an awesome stamp set for the women in your life - there are loads of words included  - even some hard to find ones, like 'Nana' and Great Grandma'!  I created a simple bouquet, watercolored with my Zig Clean Color Real Brush Markers.    It's adhered with foam tape on the sentiment strip, and I added some black polka dot paper for some nice contrast!   I just love black & pink together!!

Be sure to check out Sweet Stamp Shop to see more of their April release!!   Thanks for stopping by!

Hero Arts Mother's Day Card

Hello!   It's my day over on A Blog Named Hero - stop on over to check out my card that includes very little stamping!

Thursday, April 20, 2017

A Little Note To Lift Your Spirits!

Hi guys!   I broke out that gorgeous hot air balloon stamp from CAS-ual Fridays' Floating stamp set to make a soft and pretty encouragement card.
I started by inking my card base with Distress Inks to create a cloudy sky.  I heat embossed the hot air balloon on vellum with silver embossing powder and colored everything in on the back side of the vellum with Copic markers.   I fussy cut the hot air balloon and temporarily adhered it to the sunburst piece (created from an embossing folder).   I cut the sunburst piece along the hot air balloon so I could inlay the piece against the cloud background.     A little Distress Ink added some highlights to the sunburst piece.   The sentiment is also from CAS-ual Fridays' Floating stamp set.
Thanks for checking out my card today!   Be sure to use coupon code KIMBERLY2017 if you do some shopping at the CFS store - you can save 15%!!!!!!


Wednesday, April 19, 2017

'Be Creative' Wall Hanging

Hello!    I have a non-card project to share with you today!   When I received my awesome box of supplies from ADORNit and saw their  Bracket Shaped Surface Set, I  knew immediately that I wanted to make a wall hanging for my craft room.   

I traced the shape onto the back side of the Blender Basics - Black Chevron paper and used an X-acto knife to cut it out.   I decoupaged the patterned paper onto the bracket shape with Mod Podge, and added some Black Soot Distress Ink to the edges.     

I cut the letters using my Scan n Cut, and decoupaged them onto the shape as well.   Once dry, I added a few spritzes of white ink spray - I'm not wild about how those turned out, but they do give it a kind of distressed look, which is fun!   My last coat of Mod Podge smeared the ink a bit, but I still like the results!    Once the Mod Podge was fully dry, I coated the entire shape with glitter spray and used my Crop-A-Dile to cut holes in the top to thread the red cord through.   It looks great hanging on my craft room door!  

These shape surfaces are so much fun!   Next up is one for my daughter's bedroom!   I'll be sure to share once it's finished!    

Thanks so much for stopping by!


Thursday, April 13, 2017

Sweet Stamp Shop April Release

Hello!  I'm excited to be sharing some projects this month for Sweet Stamp Shop - you  just  HAVE to check out the adorable little heroes they're releasing today!   

I created a card using three of the five stamp sets - Army Hero, Military & Navy Hero.   

I created my background by stamping and clear heat embossing several of the words from Military onto kraft cardstock.   I heat embossed the sentiment from Navy Hero with red embossing powder and cut my sentiment strip with the star die (from Gina Marie).   My li'l Army hero is colored with Copic markers.   Isn't this set just adorable?!   My dad was in the Army, so I was excited to see this little guy in his fatigues show up in my mailbox! ;)  These stamps are perfect for sending cards to those who are serving in the military (and their family and friends as well)!!

Be sure to head over to the Sweet Stamp Shop store to check out ALL of the military heroes!

Tuesday, April 11, 2017

Turning Coloring Pages into Cards with ADORNit

Lately I've been absolutely LOVING these adorable watercolor coloring pages from the ADORNit ArtPlay Coloring Books.   I've been coloring away, but decided it was high time I turn (at least one!) into a card!  
card by Kimberly Rendino for ADORNit | You Will Forever Be My Always | colored pencils | kimpletekreativity.blogspot.com | handmade card | papercraft

Once you're done coloring these babies, it's up to you how much (or how little) you want to embellish them.   For this one, I colored with Prismacolor pencils and then went over everything with a sparkle pen.   I added some Glossy Accents to the heart for some shine!!  
card by Kimberly Rendino for ADORNit | You Will Forever Be My Always | colored pencils | kimpletekreativity.blogspot.com | handmade card | papercraft

That's it, friends!  I mounted the watercolor page to black cardstock and an aqua card base, and it's good to go!   

card by Kimberly Rendino for ADORNit | You Will Forever Be My Always | colored pencils | kimpletekreativity.blogspot.com | handmade card | papercraft

I'm particularly loving this color combination - I think you'll be seeing it again soon!! ;)
Thanks for stopping by!

Sunday, April 9, 2017

So Suzy Stamps 3rd Birthday Celebration!

Hello there friends!  This month, So Suzy Stamps is celebrating their 3rd birthday.....and I was thrilled when Suzanne Moore, the Suzy behind So Suzy Stamps, asked me to help celebrate by being a guest designer!   I was lucky enough to meet her back in January at CHA, and she's just as sweet as can be!


I worked with the Clematis Doodle, Leaf Doodle and Color of Spring stamps and created a border around a piece of 4.25' x 5.5" cardstock.   I had to do quite a bit of masking (using post-it tape), but it was a quick and easy process.  The next part, on the other hand, took some time, but the end result was so worth it!  I fussy cut around the flowers and leaves, creating a "frame" for my shaker card.   Next I used Catherine Pooler's super vivid ink pads as watercolors by swiping some ink onto my craft mat to use with my paintbrush and water.  I absolutely LOVE the bright colors, don't you?!   They were the perfect complement to the white heat embossed sentiment!   


I adhered the sentiment strip behind the frame, and then added acetate to the back as well.   I used foam tape all around the border, and also behind the sentiment strip, creating two areas of the shaker. Some Pretty Pink Posh sparkling clear and flower sequins finish off the card!  

Hope you've enjoyed my card today - be sure to head over to So Suzy Stamps to join in all of the birthday celebration fun!   Pssst.....I hear there is free shipping going on right now as well!!!   

Tuesday, April 4, 2017

Rainbow Full On Floral - Plus a Video!


  Hi guys!   I've got a fun rainbow colored card to share with you and a video to go along with it!  Michele from CAS-ual Fridays and a few of you asked for a video sharing how I used the Joseph's Coat technique to create this card for CAS-ual Fridays' new release last week, so I decided to oblige, lol!

This is such a fun technique, with a real wow-factor! Check out the video for all the details!


Like I said in the video, any black ink will work, but I really like Catherine Pooler's inks (especially the Midnight black!) because they are really, really juicy.  You can find them (and save 10% on your first order) here! Check out that gorgeous color! 


Thanks for stopping by today!  If you want to do some shopping at CAS-ual Fridays, go ahead and use my special coupon code, KIMBERLY2017 to save 15% on everything (even items from the new release!) 



Monday, April 3, 2017

A Blog Named Hero April Challenge - Anything Goes!


Happy Monday - if Monday's can be happy, lol!!   Since it's the first Monday of the month, we are bringing you the newest challenge over at A Blog Named Hero!   Anything Goes this time around, and our focus this month is solely on Hero Arts.....gotta love that!


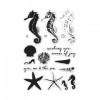
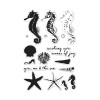
I wanted to make an elegant ocean-themed card that would work for a wedding, so I pulled out my Color Layering Seahorses and set to work!   I created the background by stamping the images with Hero Arts Shadow Ink and flicking on some gold shimmer mist.    I added my heat embossed vellum sentiment strip (with washi tape along the edges) to the card.    For added gold shine, I smooshed the edges of the panel into my Versamark ink pad and heat embossed with gold embossing powder.  I  stamped the starfish and shells with Hero Arts Shadow Inks and then heat embossed the details with gold embossing powder.   I used my Scan n Cut to cut them all out and then adhered them to the bottom of my stamped panel with varying heights of foam adhesive.  

I hope you've enjoyed my card today - be sure to play along with the challenge this month!   I can't wait to see what you create!!